In this tutorial is described the orientations and procedure ro use the Xpress as a client FTP, through the use of functions available at the libraries OSCAT and NETWORK, from Codesys.
Components
Software: MasterTool IEC XE 3.34;
CLP: XP340
Seções do Tutorial
1. ARCHITETURE
2. DEVELOPMENT
2.1. Download of a FTP Server - FileZilla Server
2.2. Insert and Connect to a administrator on the FTP server
2.3. Creating a user
2.4. Enable of the acess on the windows firewall
2.5. Creating a new Project on MasterTool IEC XE and sending the file through the FTP Server
2.6. Installing the libraries "Oscat_Basic" e "Network"
2.7. Instanciating the function FTP_CLIENT
2.8. Transferring the application to the PLC
_____________________________________________________________________________________________
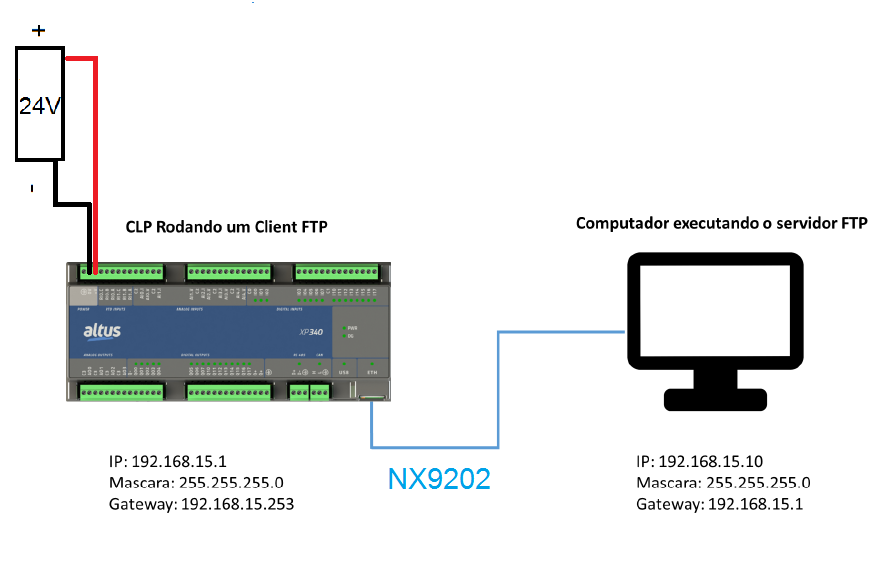
1. ARCHITETURE
In the architeture of this tutorial the XP340 was connected to a power supply of 24VDC and the ethernet port of our PLC was connected to the ethernet port of the computer through a NX9202 cable.
2. DEVELOPMENT
In this tutorial we described the steps to use the Xpress as a client FTP. First, we should download the libraries OSCAT Basic and Network, at the Codesys website and insert it into the library repository, in the MasterTool IEC XE. So it is necessary to declare the parameters for the function block and download the FileZilla Server to configure it. It is important to have the Nexto Xpress manual to future consults and questions that may appear while building the application.
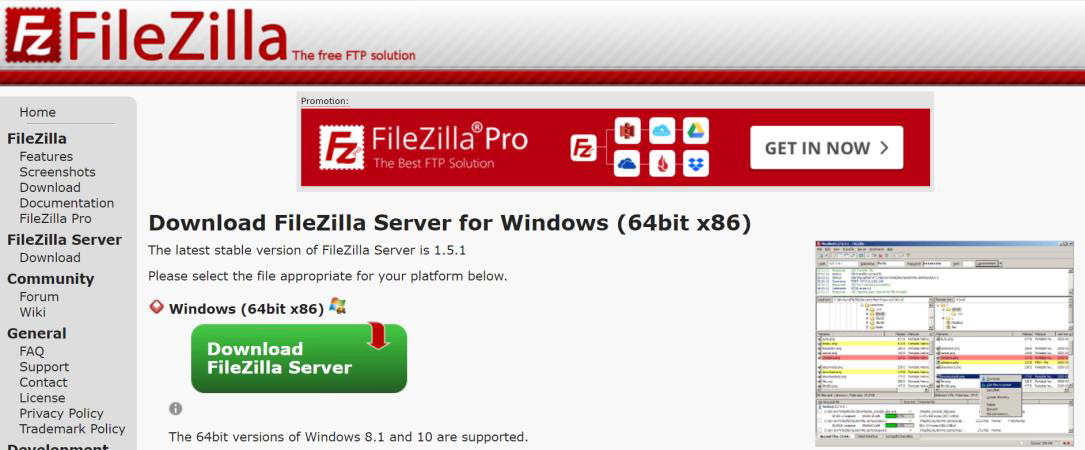
2.1. Download of a FTP Server - FileZilla Server
The first step is to download the FTP Server. We will use FileZilla.
Available at this link:
https://dl1.cdn.filezilla-project.org/server/FileZilla_Server_1.5.1_win64-setup.exe?h=5Ep1Nibc0ZY_1dqbgkPmeA&x=1659708788
2.2. Insert and Connect to a administrator on the FTP server
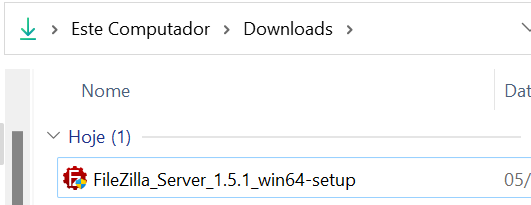
If the download was correctly executed, the following file will be executed:
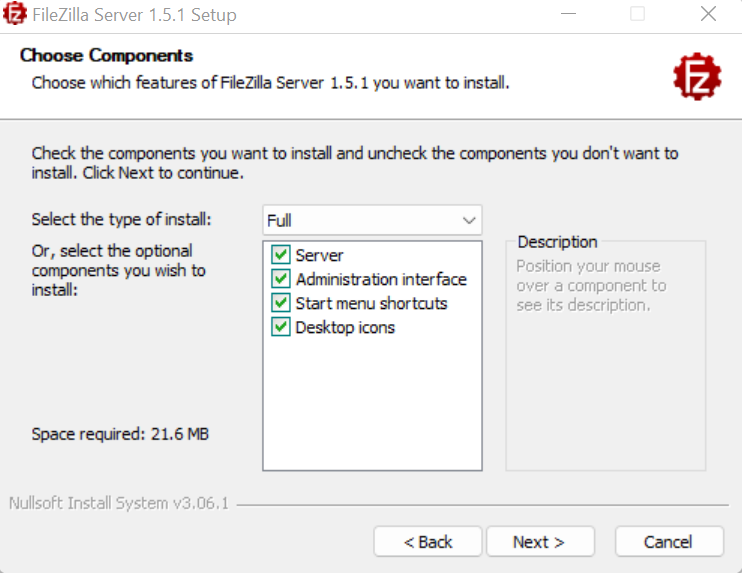
The default settings for the installation can be maintained, and in order to continue to install the server you can click on "I Agree" and "Next".
IMPORTANT: In the window configuration "Server Settings" you can define a password for the administrator, it will be used to configure the FTP server. In this example we will use the password "admin", but you can define the password as you wish to.
Define it and confrm the same password again, so click on "Next >" to continue the installation.
In this screen we will complete the installation by clicking on "Install".
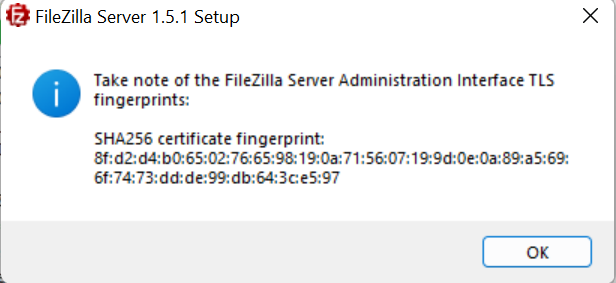
The following message will be displayed, just click on "Ok" and close the wizard installer.
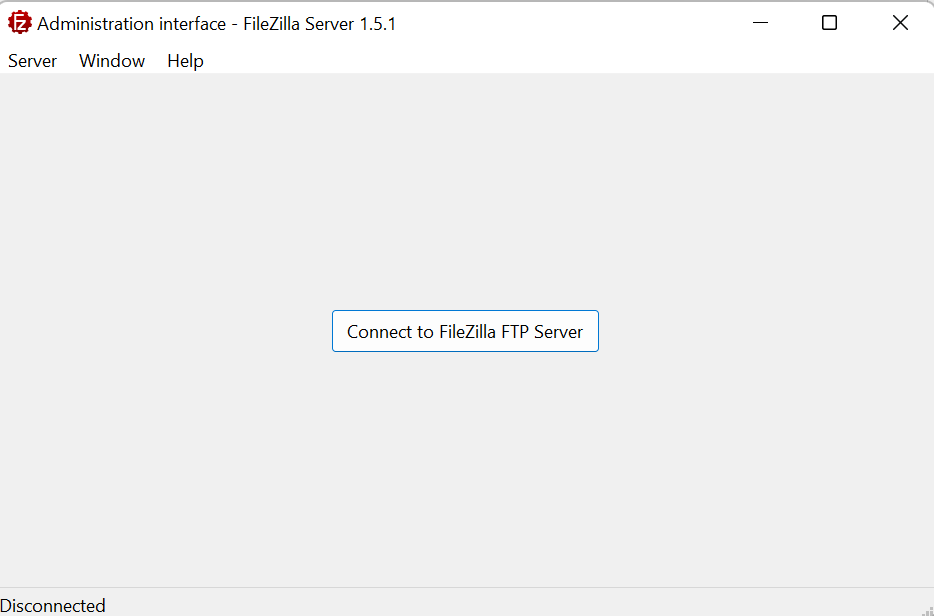
The initial screen will be opened with the configuration interface for the FTP Server. To open the connection we can click on "Connect to FileZilla FTP Server".
In the following screen you type the password defined and click on "Ok".
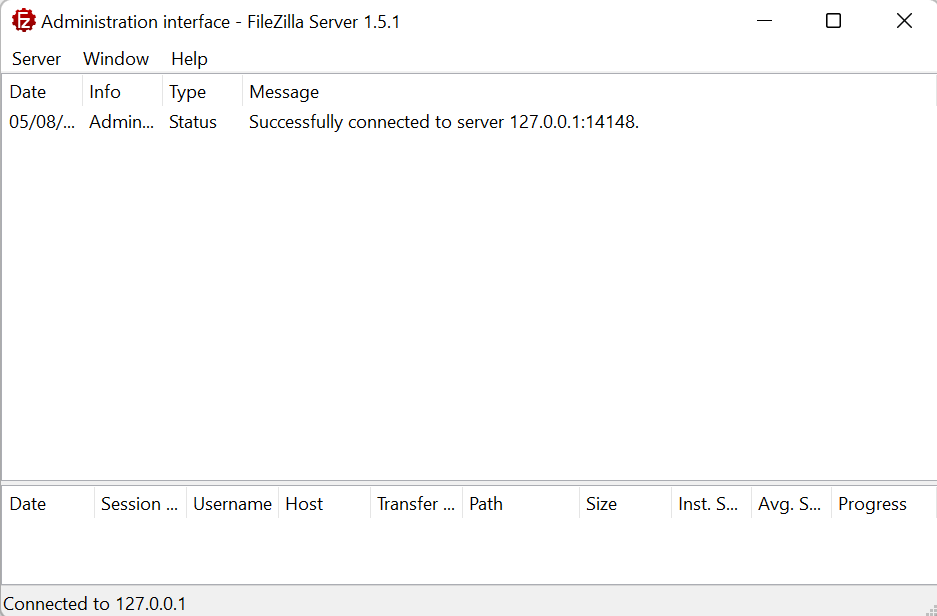
If the connection is succed this message will be displayed.
2.3. Creating a User
To connect with the FileZilla as a Client, the PLC need to point to valid user credentials in the URL connection. In this step we will define a user and habilitate an exclusive folder to exchange the files through the FTP service.
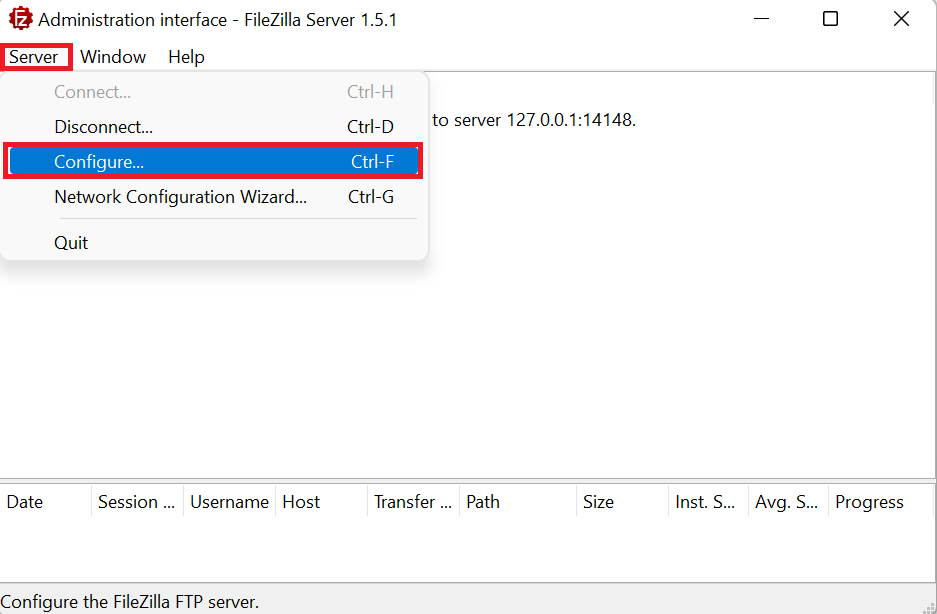
Click on "Server", then click on "Configure".
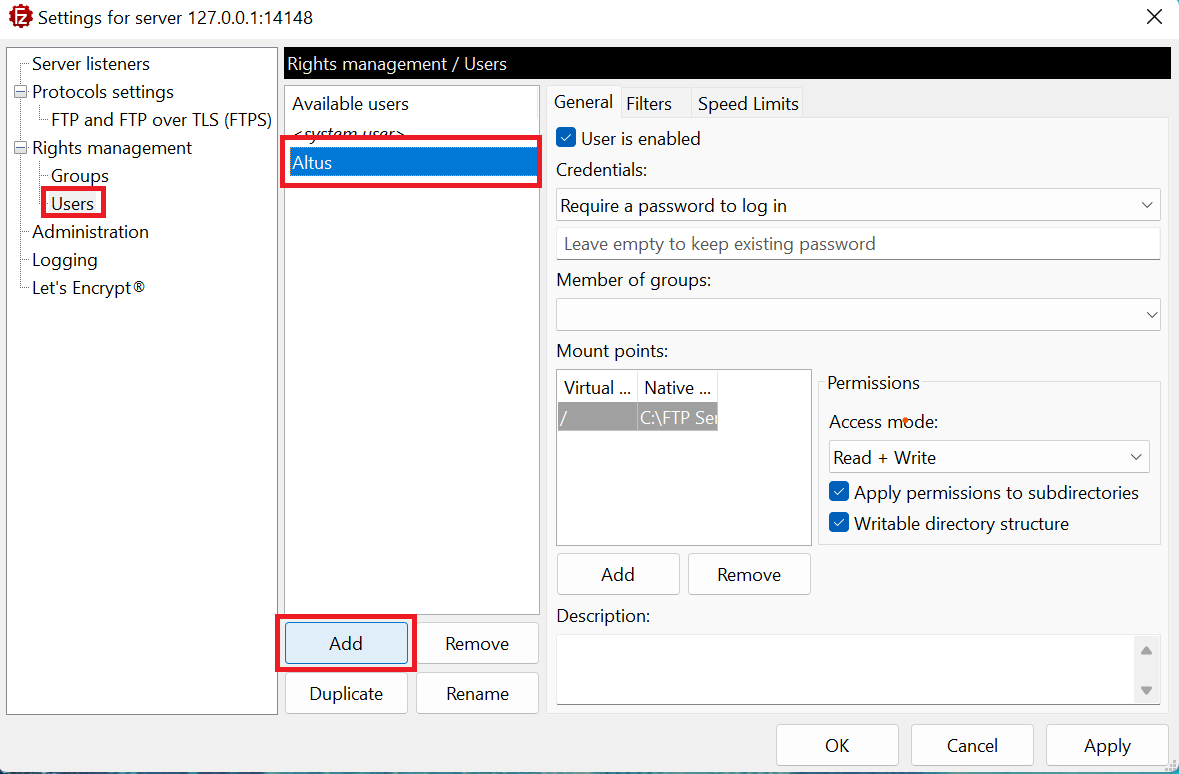
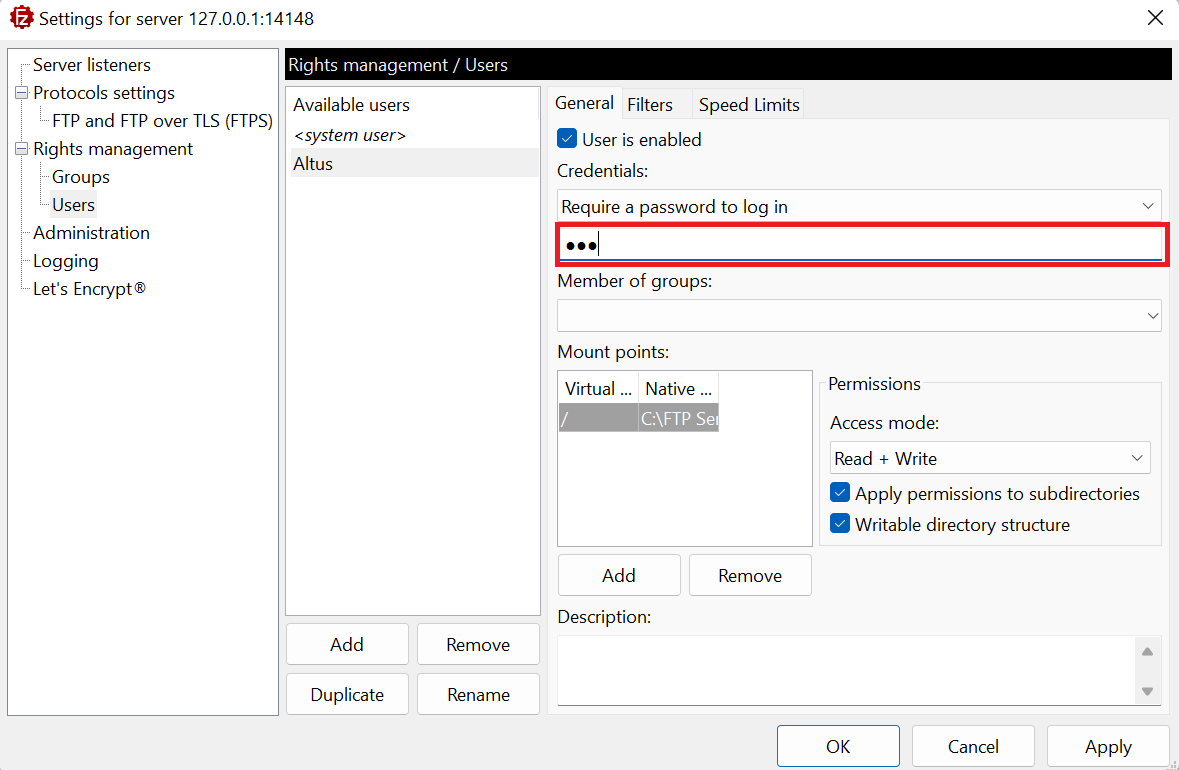
In the configuration menu we will select the option "Users" and click on add to create a new user, in this tutorial the defined name was "Altus".
The password "123" will be defined for this user.
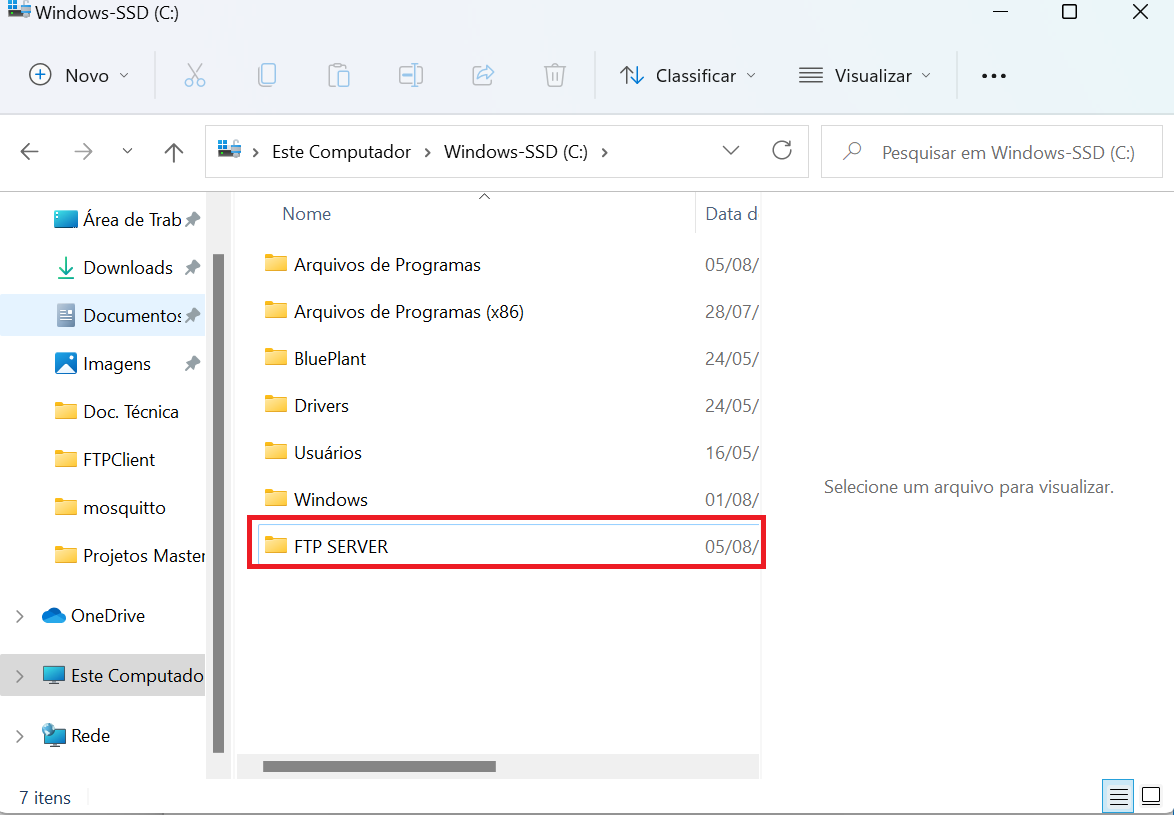
When the user is created and configured we will create a folder where the archives sent by the PLC will be stored. This folder can be alocated in any diretory, but i this case we used
C:.
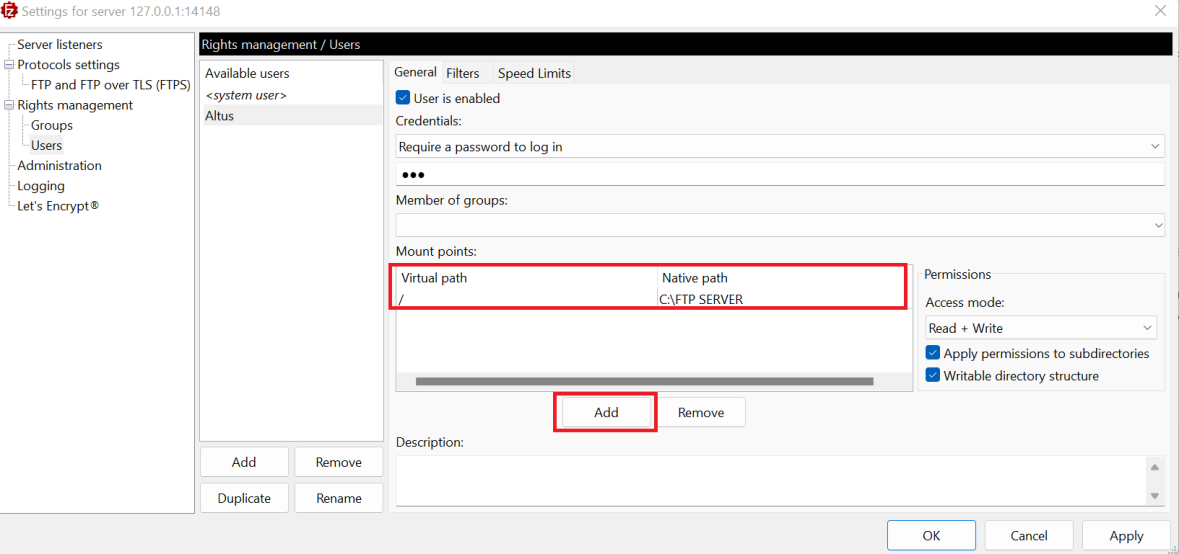
When the folder is created we must access it and copy its path in Windows, in this tutorial the path is defined as “C:\FTP SERVER”
Back in the user settings, we must add a new “Mount Point” and paste the path of the folder created earlier in the “Native Path” column and insert a “/” in the “Virtual Path” column. Our user Altus with password 123 will be properly configured, and to finish the configuration we will click on "Apply" and "ok".
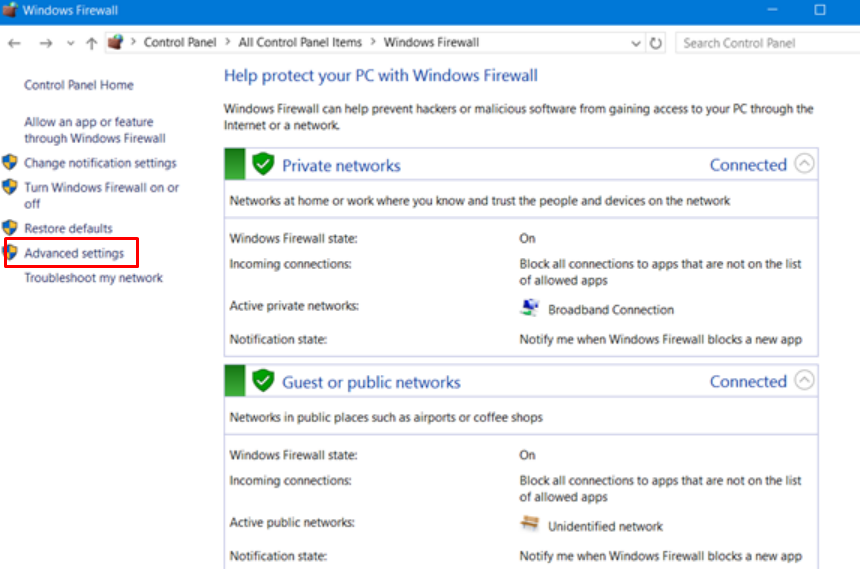
2.4. Enable of the acess on the windows firewall
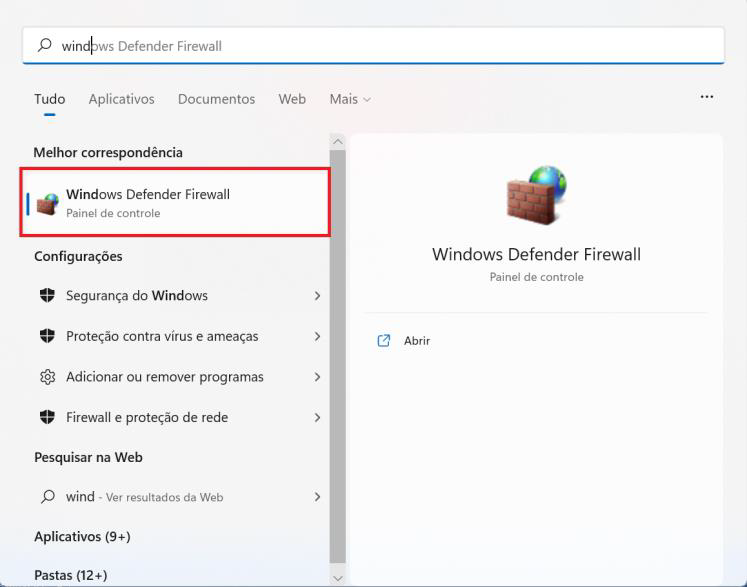
To allow the PLC to acess the FTP Server executing in our computer, a new inbound rule must be defined.
To acess the firewall configurations you can sarch for “Windows Defender Firewall” in the windows search bar.
To add a inbound rule we must acess advanced settings > Inbound rules.
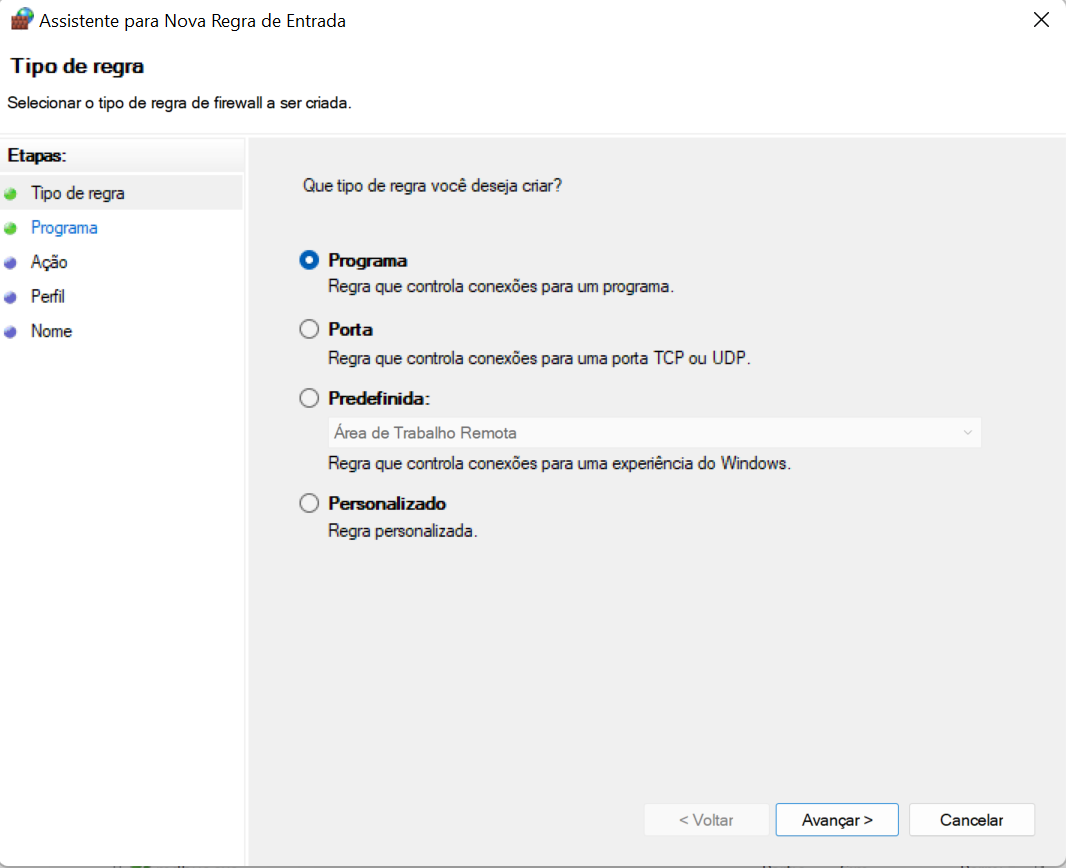
Then we will add a "New Rule", on the right sd eof the screen.
Select Program > Next.
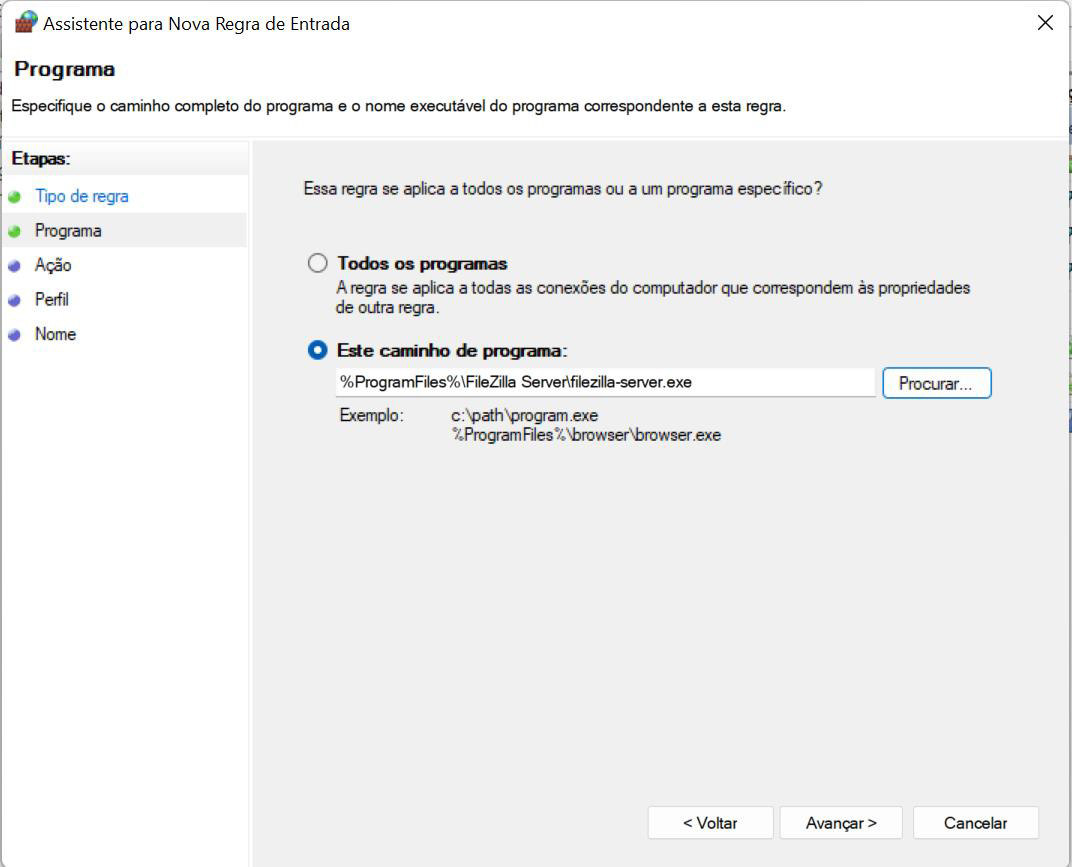
In this screen we will click on "Search", and navegate to the folder path “C:\Program Files\FileZilla Server” and select the installer “filezilla-server” and open it.
In the sequence just click on "Next" and keep the default configurations. In the item name we define the new inbound rule and finish it clicking on "Conclude".
After this, our FTP Server is configured and ready to be used.
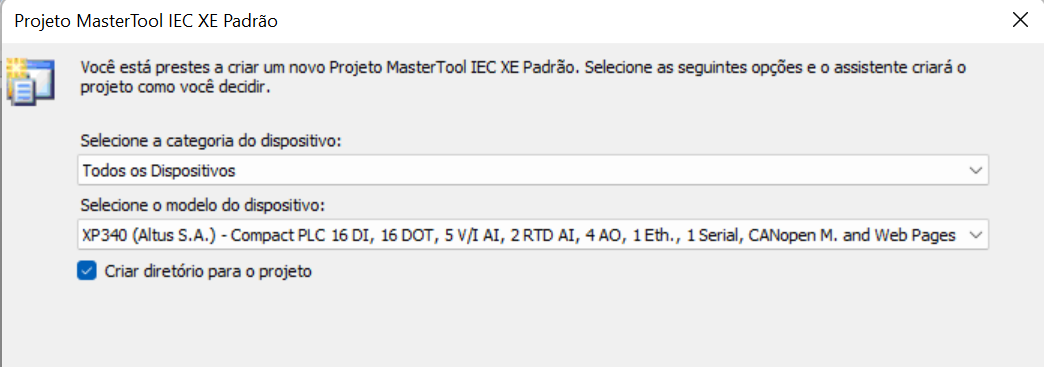
2.5. Creating a new Project on MasterTool IEC XE and sending the file through the FTP Server
At the MasterTool Wizard, we will create a new projec with ou PLC model. In this tutorial we selected the XP340.
With the new project open, we will create a new .txt file, and alocate it in the internal memory of the PLC, to test the transmission with our FTP server. We wll send the file from the PLC to the folder cretaed for our FTP user in the C: diretory.
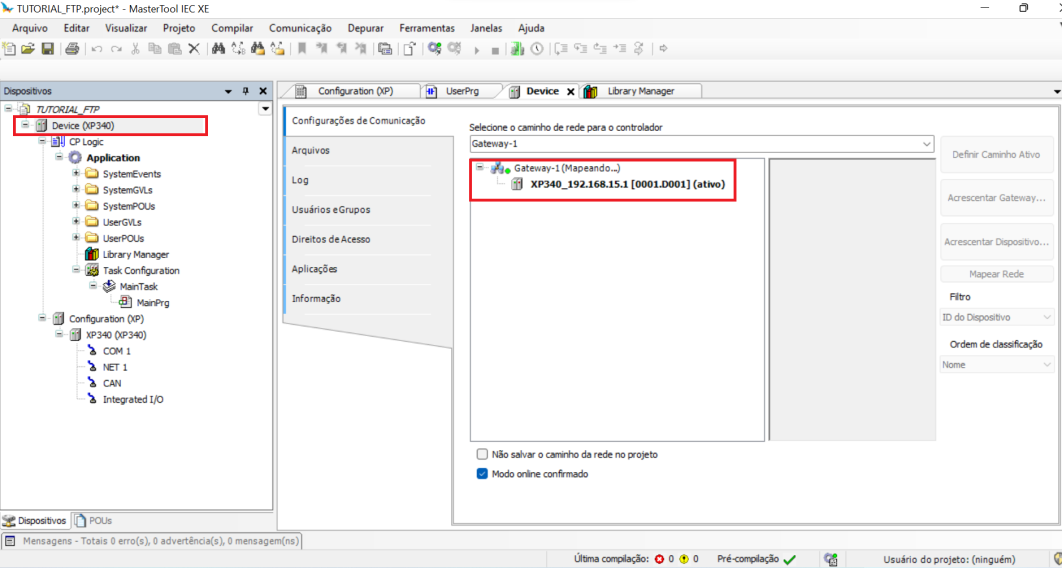
To acess the files in the internal memory of our PLC we must navegate to the tab "Device" at the treeview. Then we will add a gateway with the IP adress for our PLC and and define it as the active path for our applicattion.
We will create a new file, named TESTE.txt in the rgeular notepad, and insert it at the internal memory folder for our PLC.
The file was created at our desktop and we will transfer it to the internal memory of the XP340.
It is important to guarantee that the file will not be empty, although its context doesn`t matter. It will be used to confirm the sucess when sendIng and receiving the file through FTP.
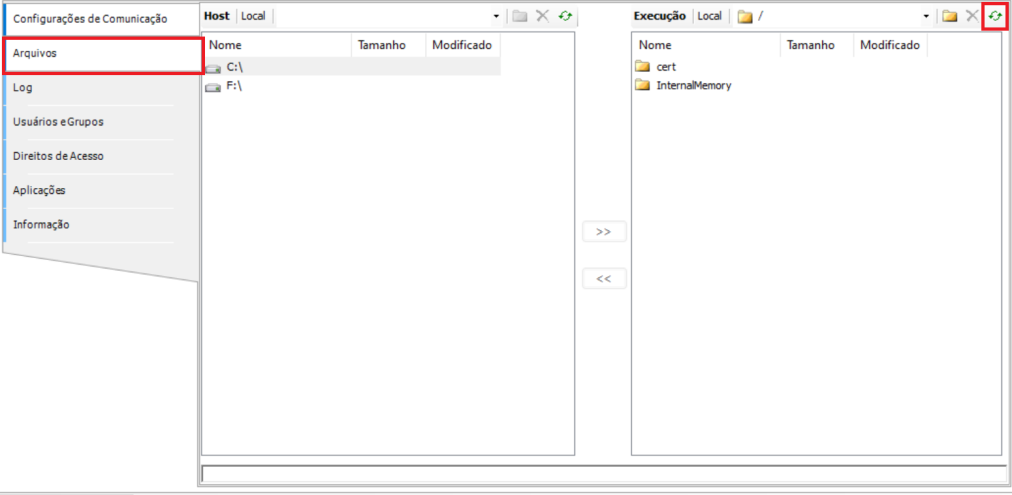
To acess the intern files, still on the menu “Devices” we shold navegate to tab “Files”, wherein the left side will be showed the local files in the computer. At the right side, just click on "Refresh" and the internal files will be displayed.
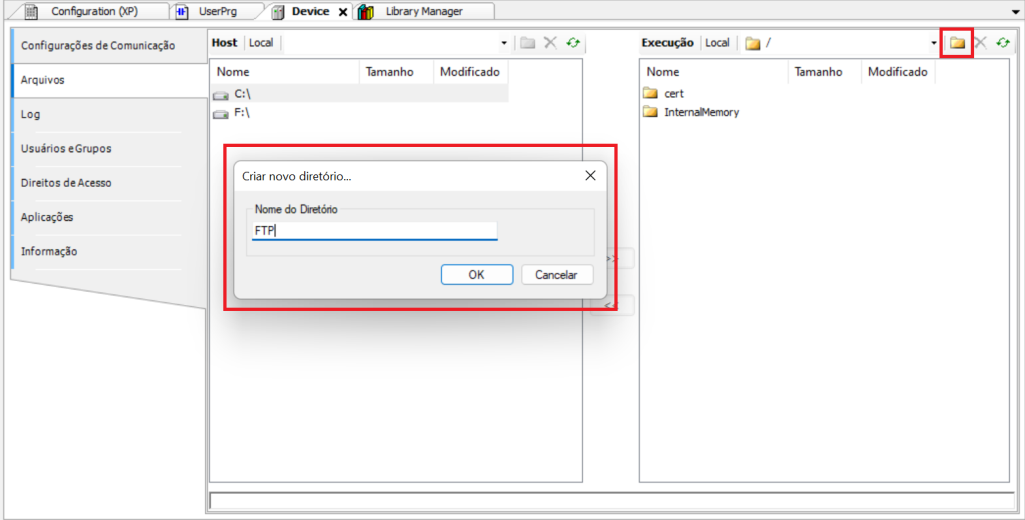
Inside the internal memory, we created a new folder path called "FTP".
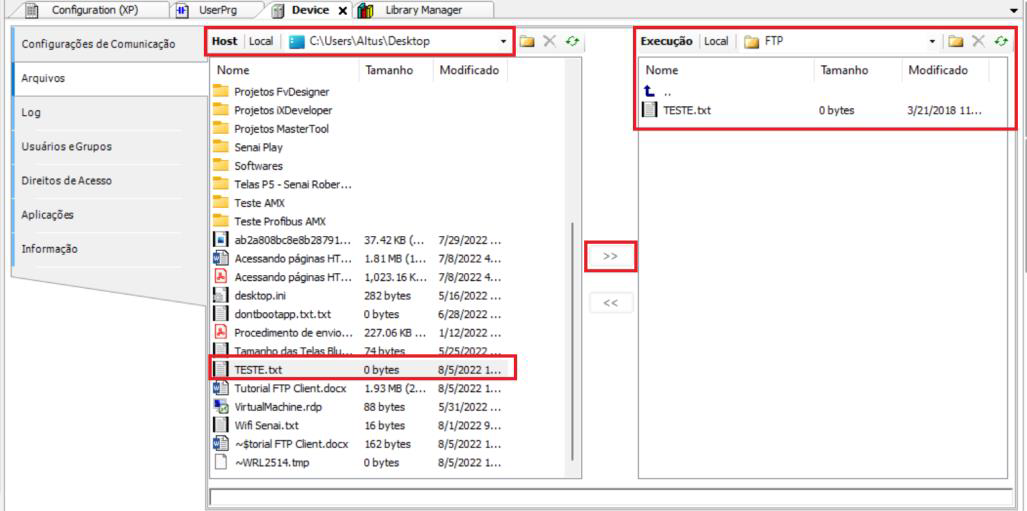
Our file “TESTE” was downloaded for our FTP folder, to transfer the file you must find the path of your dektop at the computer diretory on the left, the default path can be inserted at the tab "Host" is "C:\your_user\Desktop", after finding the file just select it and click on “>>” to transfer it to the PLC folder.
2.6. Installing the libraries "Oscat_Basic" e "Network"
To properly use the FTP_Client function, the libraries "Network" and "Oscat Basic" should be added to the project. This librraies can be downloades for free at the Codesys website, using the links below.
OSCAT BASIC: https://store.codesys.com/en/oscat-basic.html
OSCAT NETWORK: https://store.codesys.com/en/oscat-network.html
The files must be extracted through the native 7-ZIP from Windows.
The following folders will be created.
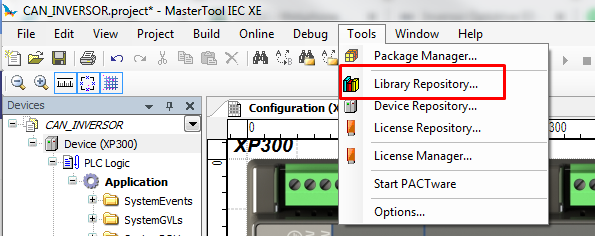
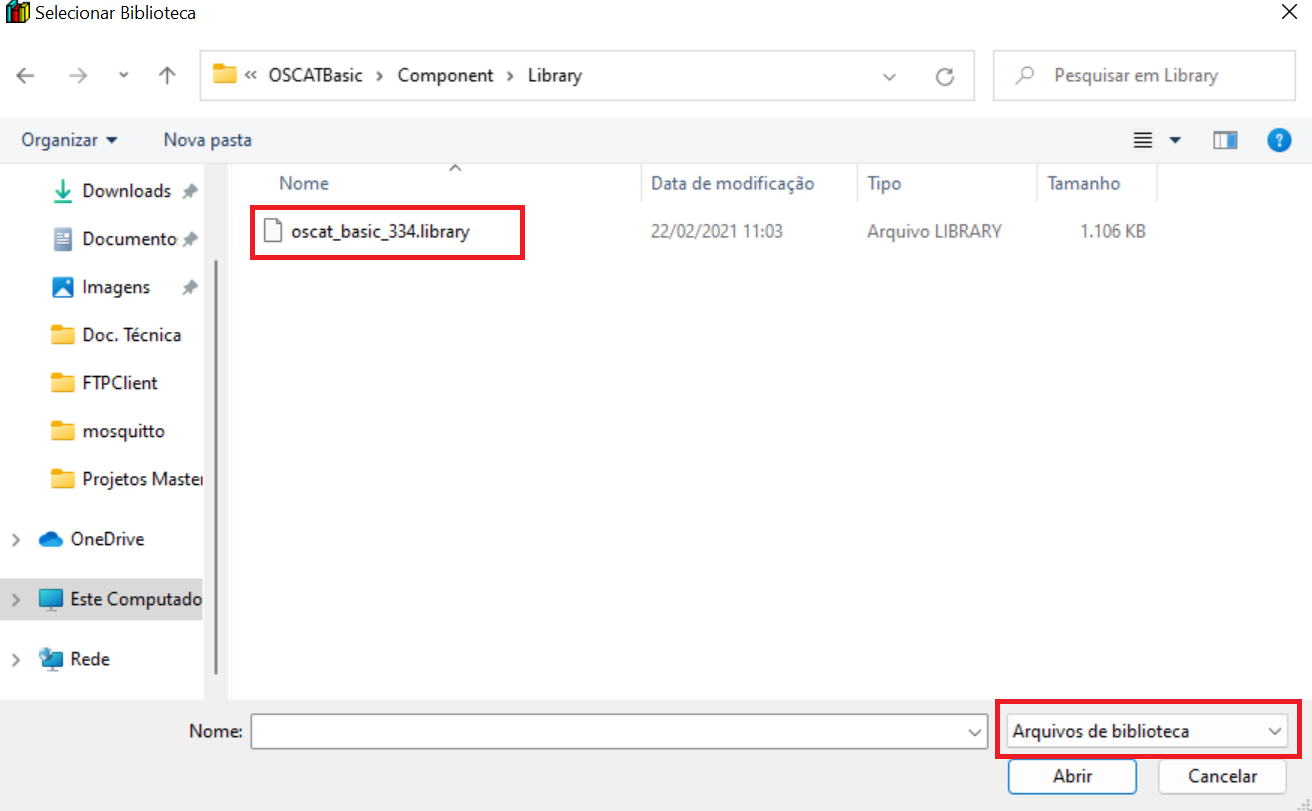
The compiled libraries files must be added to MasterTool through the library repository.
In the following screen, click on "Install" and search for the files with the extension ".library".
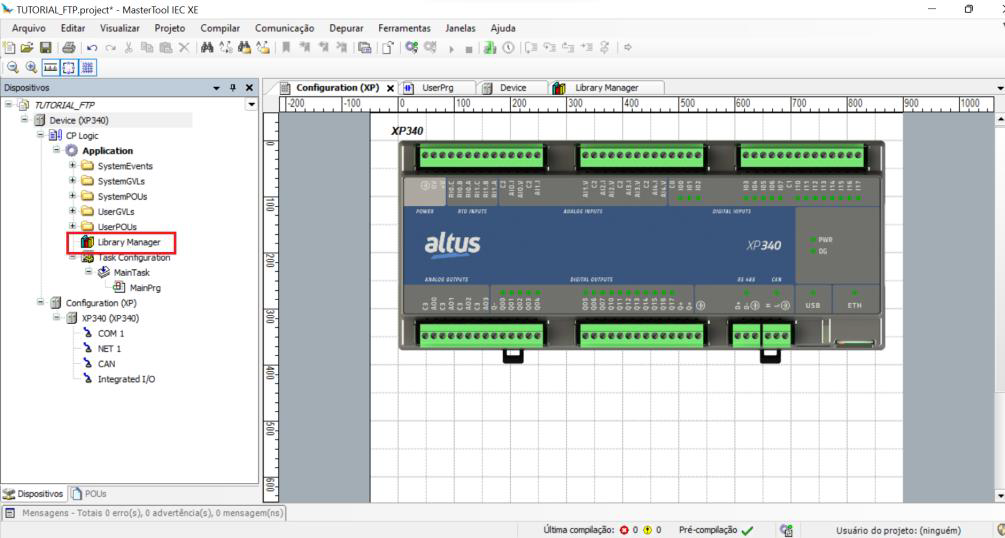
After this, select the item library manager on the treeview.
At Library Manager, click on "Add library", search for “Basic” and add the library “BASIC”, selecting it and clicking on “OK”. Repeat the same steps to include the library "Network" to the project.
IMPORTANT: When searching for "Network", two libraries with the name "Network" will be displayed, the correct one is the "NETWORK" with capital letters.
2.7. Instanciating the function FTP_CLIENT
After installing the libraries, we will be able to use the function FTP_Client available at the library OSCAT_NETWORK.
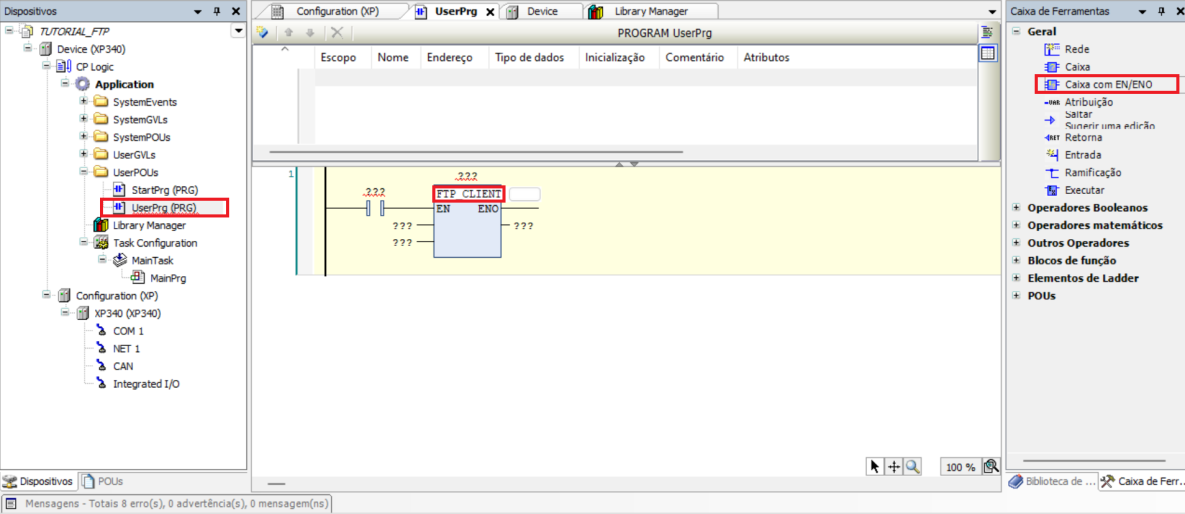
We must add a EN/ENO box at the Userprg and intanciate the function block "FTP_Client".
We defined the variable FTP for the type FTP_Client.
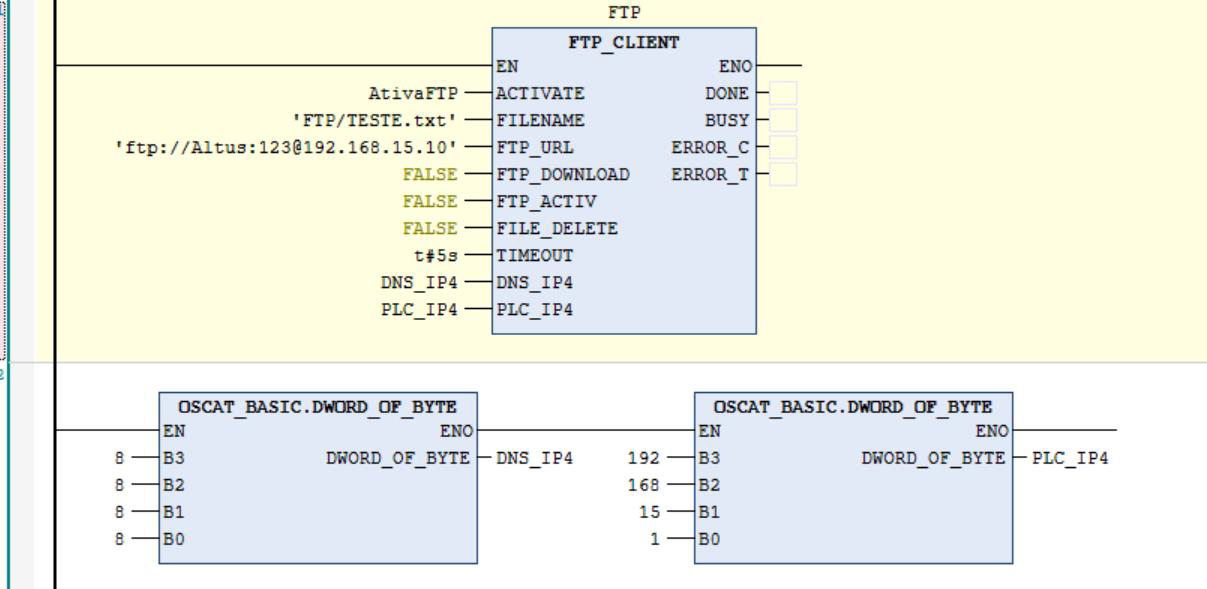
The function block can be parametrized like:
The parameters DNS_IP4 and PLC_IP4 will be the variables that result from both functions below:

We just need to add a box EN\ENO and instanciate it as "OSCAT_BASIC.DWORD_OF_BYTE", where the variable DNS_IP4 must reflect the IP DNS from the FTP server and the PLC_IP4 results the IP adress for our PLC. Both of them are divided in four bytes per octeto, resulting in a output variable of 32 bits.
This function must be parametrized like this:
Where:
INPUTS
ACTIVATE (BOOL) = Activate the FTP requestion
FILENAME (STRING) = Name defined for the file that will be transfered to the FTP folder created before.
FTP_URL (STRING) = URL for the connection with the FTP Server. The default format is: ftp://usuário:senha@IP_DA_MAQUINA_RODANDO_O_SERVIDOR
FTP_DOWNLOAD (BOOL) = Defines if the file will be transfered through the PLC, or the file will be downloaded from the FTP_Server (FALSE = UPLOAD, TRUE = DOWNLOAD)
FTP_ACTIVE (BOOL) = Defines if the FTP_client will behave in an active or passive form. (FALSE = Passive, TRUE = Active)
FILE_DELETE (BOOL) = Defines if the file will be deleted right ater the transference to the server is completed. (FALSE = Wont be deleted, TRUE = Will be deleted)
TIMEOUT (TIME) = Defines a time out period.
DNS_IP4(DWORD) = Adress for the IP DNS from the server. (Caso exista algum)
PLC_IP4 (DWORD) = IP adress from the PLC.
OUTPUTS
DONE (BOOL) = The request was succesfully concluded.
BUSY (BOOL) = Indication status forr the PLC when executing the function.
ERRO_C (DWORD) = Error code for the function. When pointing 0 indicates that it was executed correctly and there is no errors.
ERRO_T (DWORD) = Error type
2.8. Transferring the application to the PLC
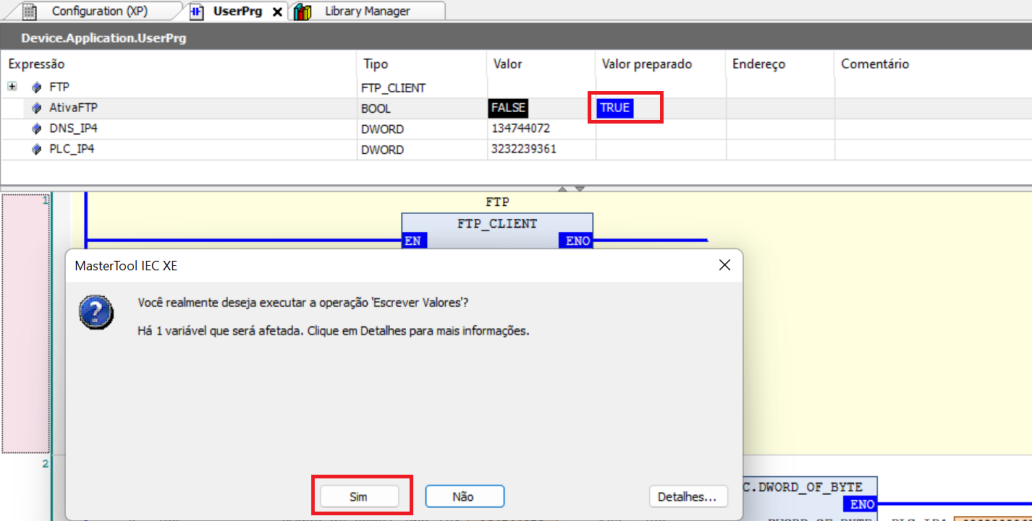
To test the applicattion we will login with our PLC.
When logged with our PLC, we will prepare and write the value TRUE to our variable that activates the function and iniciates the requisition to send the file to the server.
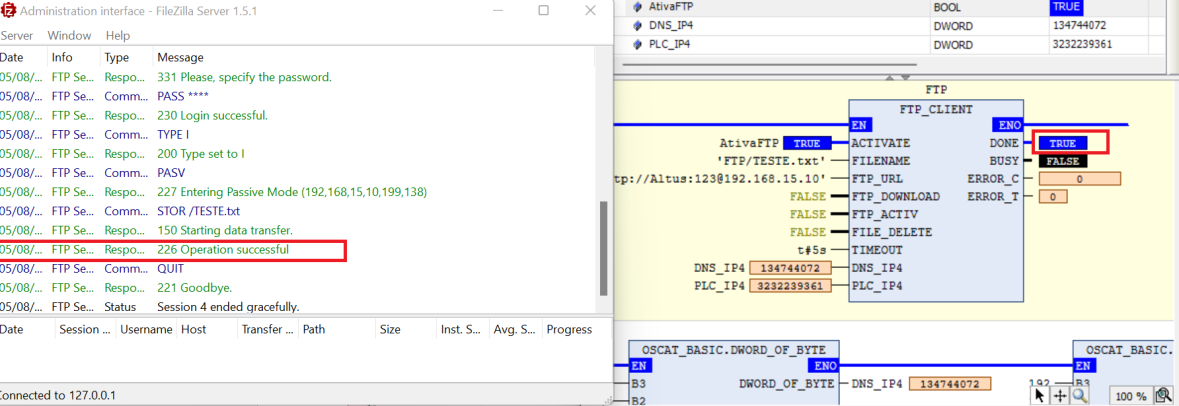
When observating the bit DONE it is possible to see if the requisition was succeded. It is also possible to see this through the Administration Interface of FileZilla.
When the tutorial is completed we will conclude that the file “TESTE” was correctly send to the folder "FTP Server" in our diretory.